Chemfix was formed as a private company in 1991 and in 1993 they formed a supply partnership with the manufacturer, Nickerson Chemicals, who have been manufacturing polymer based fillers and maintenance compounds since 1919.
In 2003 Chemfix and Nickerson were allied by a mutual sale after 10 years of solid growth, and then in 2006 Nickerson and Chemfix joined together under the Chemfix name.
Today Chemfix supplies 32 countries across 5 continents from its purpose built factory in Dewsbury, West Yorkshire, using local labour, and UK sourced raw materials. The Chemfix aim is to produce and supply quality products and excellent service that won’t cost the earth.
Timbabuild is a comprehensive range of products designed to enable high quality, durable and cost-effective timber repairs to be carried out, with the minimum of effort and maximum efficiency.
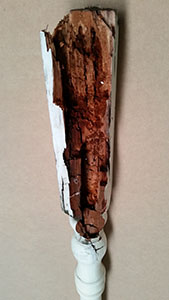
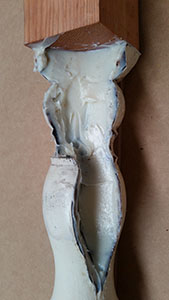
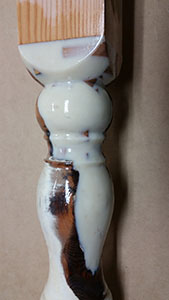
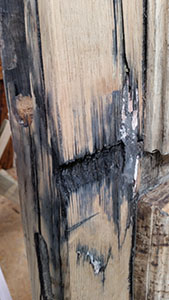
Timbabuild was developed as a permanent, effective and practical alternative to replacing damaged or rotaffected in situ timber joinery units. It is ideal for repairing windows, doors, frames and fascias. Timbabuild was developed in close consultation with local authorities, maintenance professionals and refurbishment contractors. We began by clearly identifying their needs and requirements and involved them in trials during product development.
By combining our expertise in general wood repair compounds and specifically epoxy-based products, we were able to address all of the problems previously encountered in the repair of external timber, principally dynamic movement and structural integrity. Furthermore, by producing a range of products that provides high quality repairs and addresses the environmental issues associated with the wastage of good timbers, we have produced a system that allows architects and contractors to preserve the appearance of buildings by conserving the original timbers both quickly and efficiently.
Having developed Timbabuild we remain commitied to the improvement and expansion of the range.
We are proud to boast……….
Chemfix Products – Big enough to cope, small enough to care.
Despite the significant advances made in exterior timber coatings in the past few years, little if anything has changed in the methods by which timber repairs are carried out. Traditional methods involve splicing and filling using mechanical fixings, dowels, glue and stoppers. Whilst these repairs can appear satisfactory
when first completed, they are time consuming, labour intensive, and experience shows that they will start to break down in a relatively short time, thus necessitating the need for either more repairs or complete replacement.
Use of the Timbabuild System, in conjunction with a comprehensive Prior-to-Paint and Repair Survey, can achieve a high quality, durable and cost effective repair, which could at best prevent the need for future repair altogether, and at worst considerably reduce the cost of those repairs.
The Timbabuild System also enables repairs to be carried out which would otherwise be impossible to accomplish by traditional methods. It also allows preventative maintenance to be carried out both quickly and cost effectively, stopping wood decay and eliminating the need to replace the windows in future.
TIMBABUILD EWS
Timbabuild EWS is supplied pre-measured in two small plastic bottles at a ratio of 2:1. One bottle contains the base component the other contains the activator. Having first removed all of the decayed timber and establishing that the moisture content of the timber is less than 18%, the products should be mixed thoroughly and applied to the repair area liberally using a disposable brush. Once applied it should be left for a minimum of 30 minutes to allow penetration into the timber fibres. EWS must not be left for more than four hours before applying the filling compound, as its adhesive qualities will be reduced.
TIMBABUILD EHB4
Timbabuild EHB4 is supplied in a 400ml twin cartridge, containing the base component, and the activator component separately. The product is dispensed in a specially designed dosing tool, which ensures that the correct ratio of base and activator is extruded at all times. The products are dispensed on to a plastic mixing board and blended together until an even colour is achieved. The product is then ready to be applied to the pre-prepared and stabilised area. Timbabuild EHB4 is a thixotropic filler that may be used on any surface either vertical or horizontal without the need for shuttering. Once cured, after approximately 24 hours, the product can be sanded, planed, screwed, drilled and over-painted with any surface coating just the same as traditional timber
Due to its excellent adhesive qualities and flexibility, Timbabuild EHB4 will “move” with the surrounding timber, thus preventing the future breakdown of the new repairs.
Timbabuild EHB4 allows high quality, durable and cost effective repairs to be carried out quickly and efficiently, and maintains the original character of traditional timber windows.
TIMBABUILD ERC
Timbabuild ERC is supplied in a 400ml twin cartridge, with both base and activator components in 200ml side-by-side tubes. The product is dispensed by using a purpose designed dosing tool that ensures the correct ratio of base to activator is extruded at all times. The product can either be dispensed onto a plastic mixing board for mixing by hand, or via a “mixing” nozzle, which delivers correctly mixed product directly onto the working surfaces without fuss or mess. This mixing nozzle is particularly useful when using Timbabuild ERC in conjunction with splices or cill replacement. When using ERC as a “filler” it may be used in conjunction with perspex shuttering to prevent slumping. Cure time is approximately one hour, making it the ideal product to use on responsive and “one-off” repairs. Once cured it displays the same characteristics as Timbabuild EHB4 in that it may be sanded, planed, screwed, drilled and over-painted. Also due to its excellent adhesion qualities and flexibility it will “move” with the surrounding timber.
Timbabuild ERC is the ideal product for splicing, cill replacement, responsive and one-off repairs, producing a high quality, durable and cost effective finish.
TIMBAGLAZE
Timbaglaze is supplied in a single 290ml cartridge dispensed using a standard sealant gun. It is supplied in white, and comes complete with nozzle for direct application to the glazing rebate. Timbaglaze is UV and weather resistant and will stay elastic under extreme climatic conditions, and prevents future water ingress. Paintable after one hour, Timbaglaze can be over-painted using alkyd based paints.
Timbaseal provides a permanent water tight seal, which helps prevent the problems associated with the failure of traditional glazing putty.
To prevent skin sensitisation, which can sometimes occur when working with epoxy based products, we recommend operatives wear nitrile rubber gloves and that hands are washed thoroughly with soap and water after working with Timbabuild products.
Safety goggles should always be worn when routing out damaged timber, sanding down Timbabuild and joinery units in preparation for over-painting.
Dust masks should be worn when sanding down using power tools.
Safety helmets should always be worn when working on ladders or scaffolding.
- Approved 110V Routing Tool to remove damaged timber.
- Perspex mixing board
- Set of three mixing knives.
- Timbabuild EHB4 Dosing Tool.
- Timbabuild ERC Dosing Tool.
- Sealant Gun.
- Electronic moisture meter.
- Abrasive paper.
- Hot air blower.
- Perspex pieces for shuttering
You will also need a plastic cup for mixing the EWS, nitrile gloves, dry wipes and stiff disposable brushes.
CONSERVATION JOINT
It is recommended that all joints on the bottom rails of windows be treated by this method when carrying out pre-paint repairs, whether or not there is any visible rot at the time. These joints are known to be most liable for failure, and preventative action at this stage will remove the need for more costly repairs later.

Repair Method
- Open the joint to a minimum width of 4mm and a minimum depth of 10mm using a mechanical router.
- Remove the existing paint from around the joint.
- Using abrasive paper thoroughly sand inside and around the joint to remove any loose fibres.
- Check that moisture content of the timber is less than 18% using an electronic moisture meter. If greater, dry the area using a hot-air blower. Take due care not to scorch the timber.
- Prepare and apply Timbabuild EWS liberally over the entire area and leave for 30 minutes to allow penetration.
- Mix the required quantity of Timbabuild EHB4 and apply to the joint taking care to work it well in, in order to fill any holes.
- Allow at least 24 hours to cure (at lower temperatures allow a longer period).
- Once fully cured, sand to required finish and prime using an ordinary white primer.
Before commencing work on site it is recommended that all paint be removed in order to carry out a thorough survey. In this way it is easier to identify the areas of decay. Test for the presence of decay by piercing the timber with a suitable sharp, pointed tool and feel for resistance. Finally, clearly mark the areas requiring attention.

Repair Method
- Thoroughly remove all decayed timber using a mechanical router.
- Remove all existing paint from around the area to be repaired.
- Using abrasive paper thoroughly sand the area to be repaired to remove any loose fibres.
- Check the moisture content of the timber is less than 18% using an electronic moisture meter. If greater, dry out the area using a hot air blower taking due care not to scorch the timber.
- Prepare and apply Timbabuild EWS liberally over the entire area, and leave for 30 minutes to allow penetration.
- Mix the quantity of Timbabuild EHB4 and apply to the affected area, taking care to work it in well in order to fill any voids. Mould the filler to the approximate shape and use the edge of the application knife to achieve a smooth finish.
- Allow at least 24 hours to cure (longer in colder temperatures).
- Once fully cured, sand to required finish and prime using an ordinary white primer.
Splicing in of new timber may be desirable due to decay or vandalism. If the repair is due to decay, and is part of a pre-paint repair programme, then we recommend using Timbabuild EHB4 as the bedding in agent. However, if the repair is due to an act of vandalism, or is a one-off repair, then we recommend the use of Timbabuild ERC to enable the repair to be carried out and finished as quickly as possible. When using Timbabuild ERC as a filler, particularly on vertical surfaces, it is sometimes necessary to use Perspex shuttering in order to prevent slumping.

Repair Method
- Thoroughly remove all decayed timber using a mechanical router.
- Remove all existing paint from around the area to be repaired.
- Using abrasive paper thoroughly sand the area to be repaired to remove any loose fibres.
- Check the moisture content of the timber is less than 18% using an electronic moisture meter. If greater, dry out the area using a hot air blower taking due care not to scorch the timber.
- Prepare and apply Timbabuild EWS liberally over the entire area, and leave for 30 minutes to allow penetration.
- Prepare the splice (a point to note is that the splice does not have to be an exact shape or size, in fact the splice being installed should be at least 4mm smaller than the area to be repaired).
- Mix the quantity of Timbabuild EHB4 or ERC (depending on the type of repair) and apply a bed of resin over the entire area to be repaired to a minimum depth of 4mm.
- Force the splice into place and ensure that all voids are filled. Remove any excess resin.
- If using Timbabuild ERC fix perspex shuttering in place if required.
- Allow to fully cure (24 hours for Timbabuild EHB4 – 1 hour for Timbabuild ERC). Remove shuttering where necessary and then finally sand down and prime.
Before starting work ensure that you have the correct timber profile available for the replacement cill.
Repair Method
- Completely remove the rotten cill.
- Remove any decayed timber at the back of the cill using a mechanical router.
- Remove all existing paint from around the area to be repaired.
- Using abrasive paper thoroughly sand the area to be repaired to remove any loose fibres.
- Check the moisture content of the timber is less than 18% using an electronic moisture meter. If greater, dry out the area using a hot air blower taking due care not to scorch the timber.
- Prepare and apply Timbabuild EWS liberally over the entire area to be repaired, and to all the contact edges of the new cill. Leave for 30 minutes to allow for penetration.
- Using the mixing nozzle apply Timbabuild ERC over the entire area to be repaired and over the contact edges of the new cill.
- Work the new cill into place, taking care to ensure that all voids are filled.
- Counter sink any fixings and apply Timbabuild ERC to the fixing holes.
- Allow fully cure (approximately one hour), followed by sanding and priming for paint.

